
DIY Outdoor String Light Poles for Less
I’ve been jonesin’ for some added ambiance to our backyard pool area. Although there’s lighting on the deck attached to the pool area as well as the pool shed, our pool itself has always lacked lighting at night, especially since there’s no lighting within the pool itself.
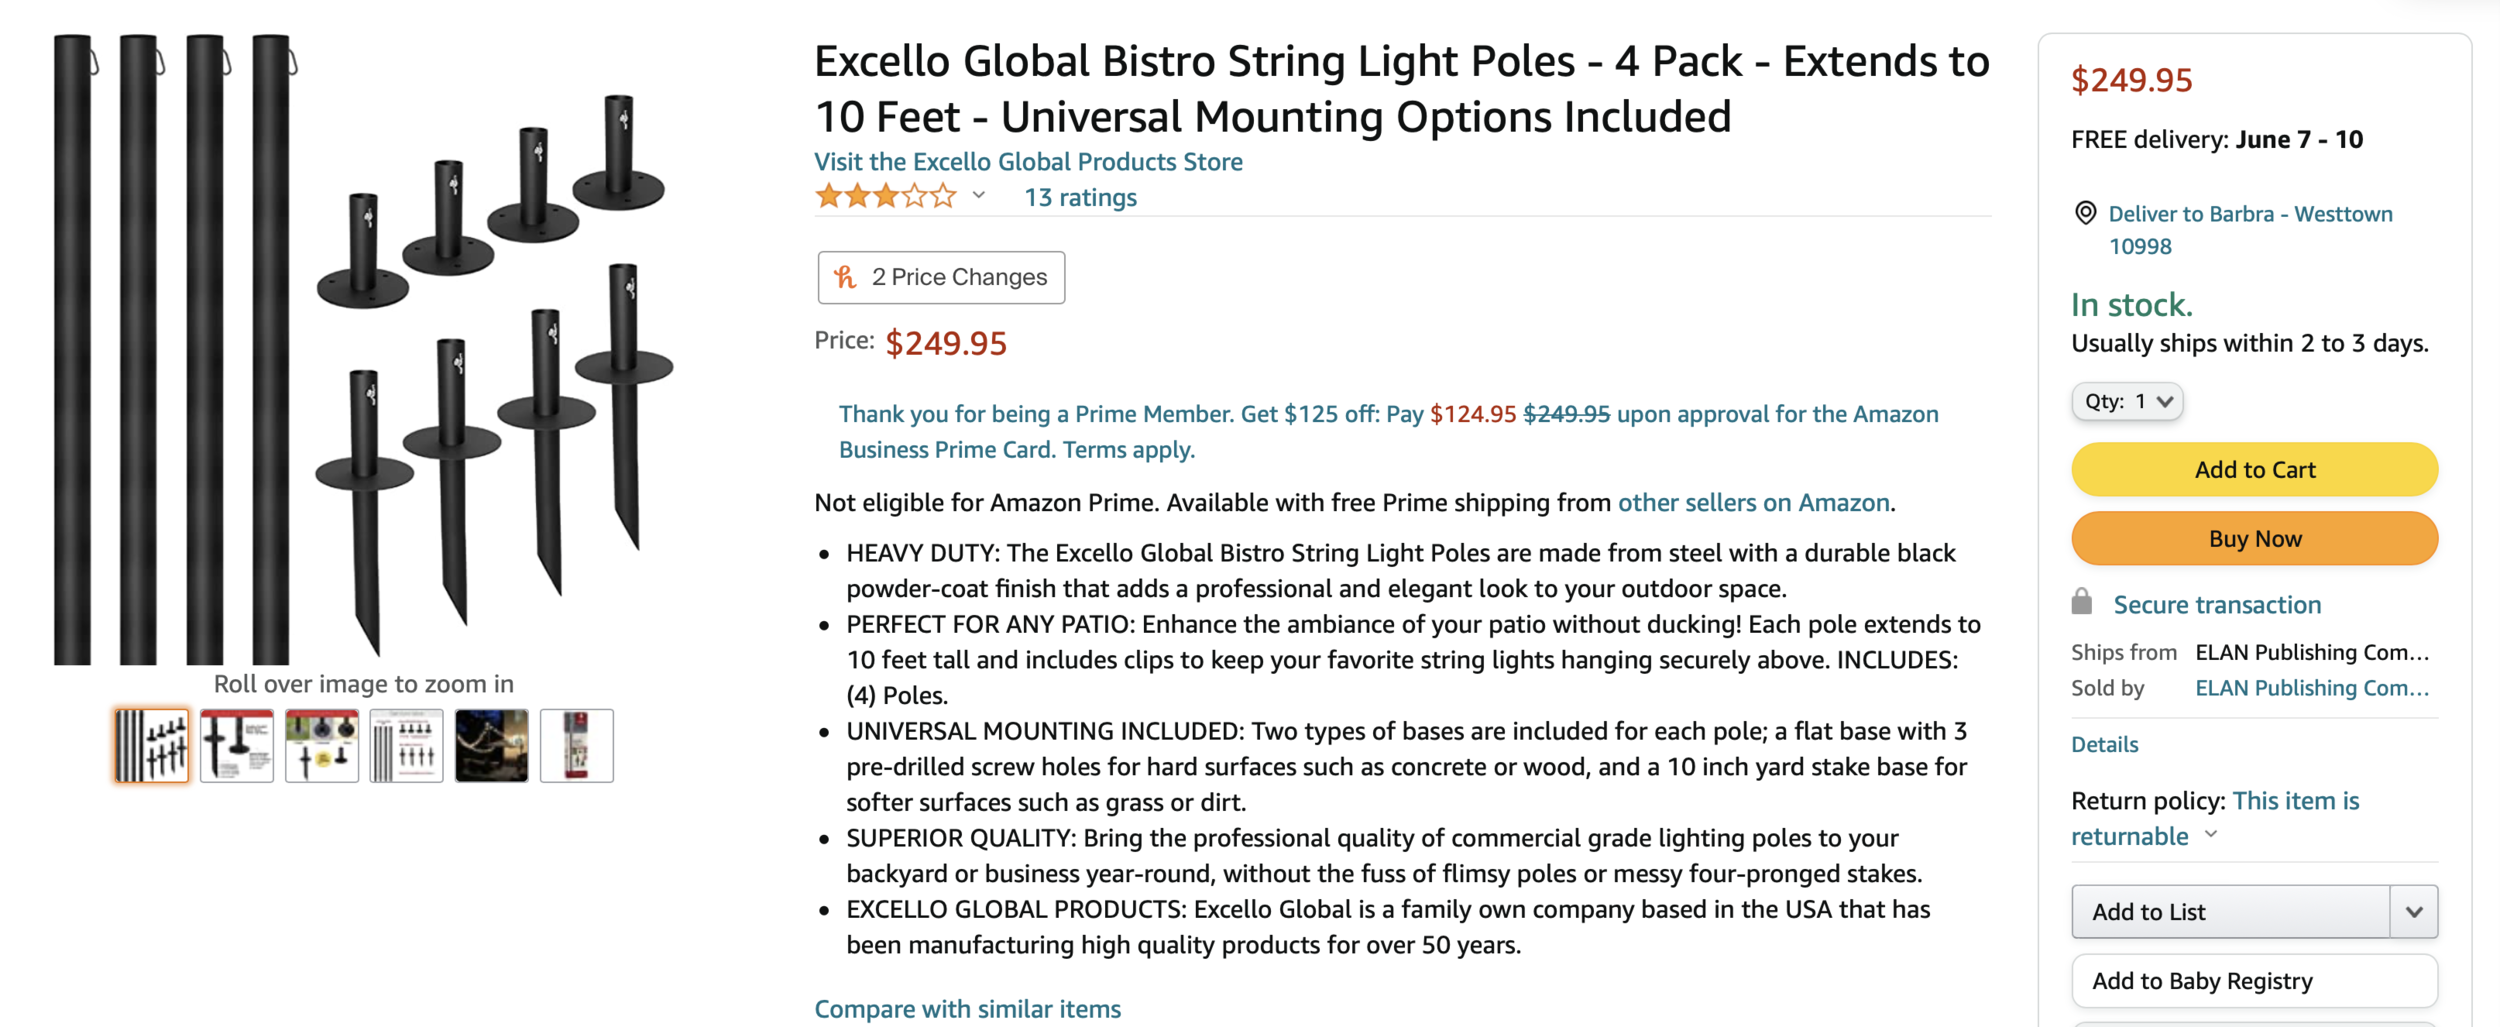
About 5 years ago, I took three strands of the leftover string lights from our wedding (the $12 ones linked below), made posts out of 1x2x8’s, ziptied them to the posts around my deck, and they’ve stood the test of time. So ever since painting my pool fence black last year, I’ve been itching to do the same around our pool. Buying light posts off amazon will run you around $250 for four poles,
I did the same for under $60 plus the cost of lights.
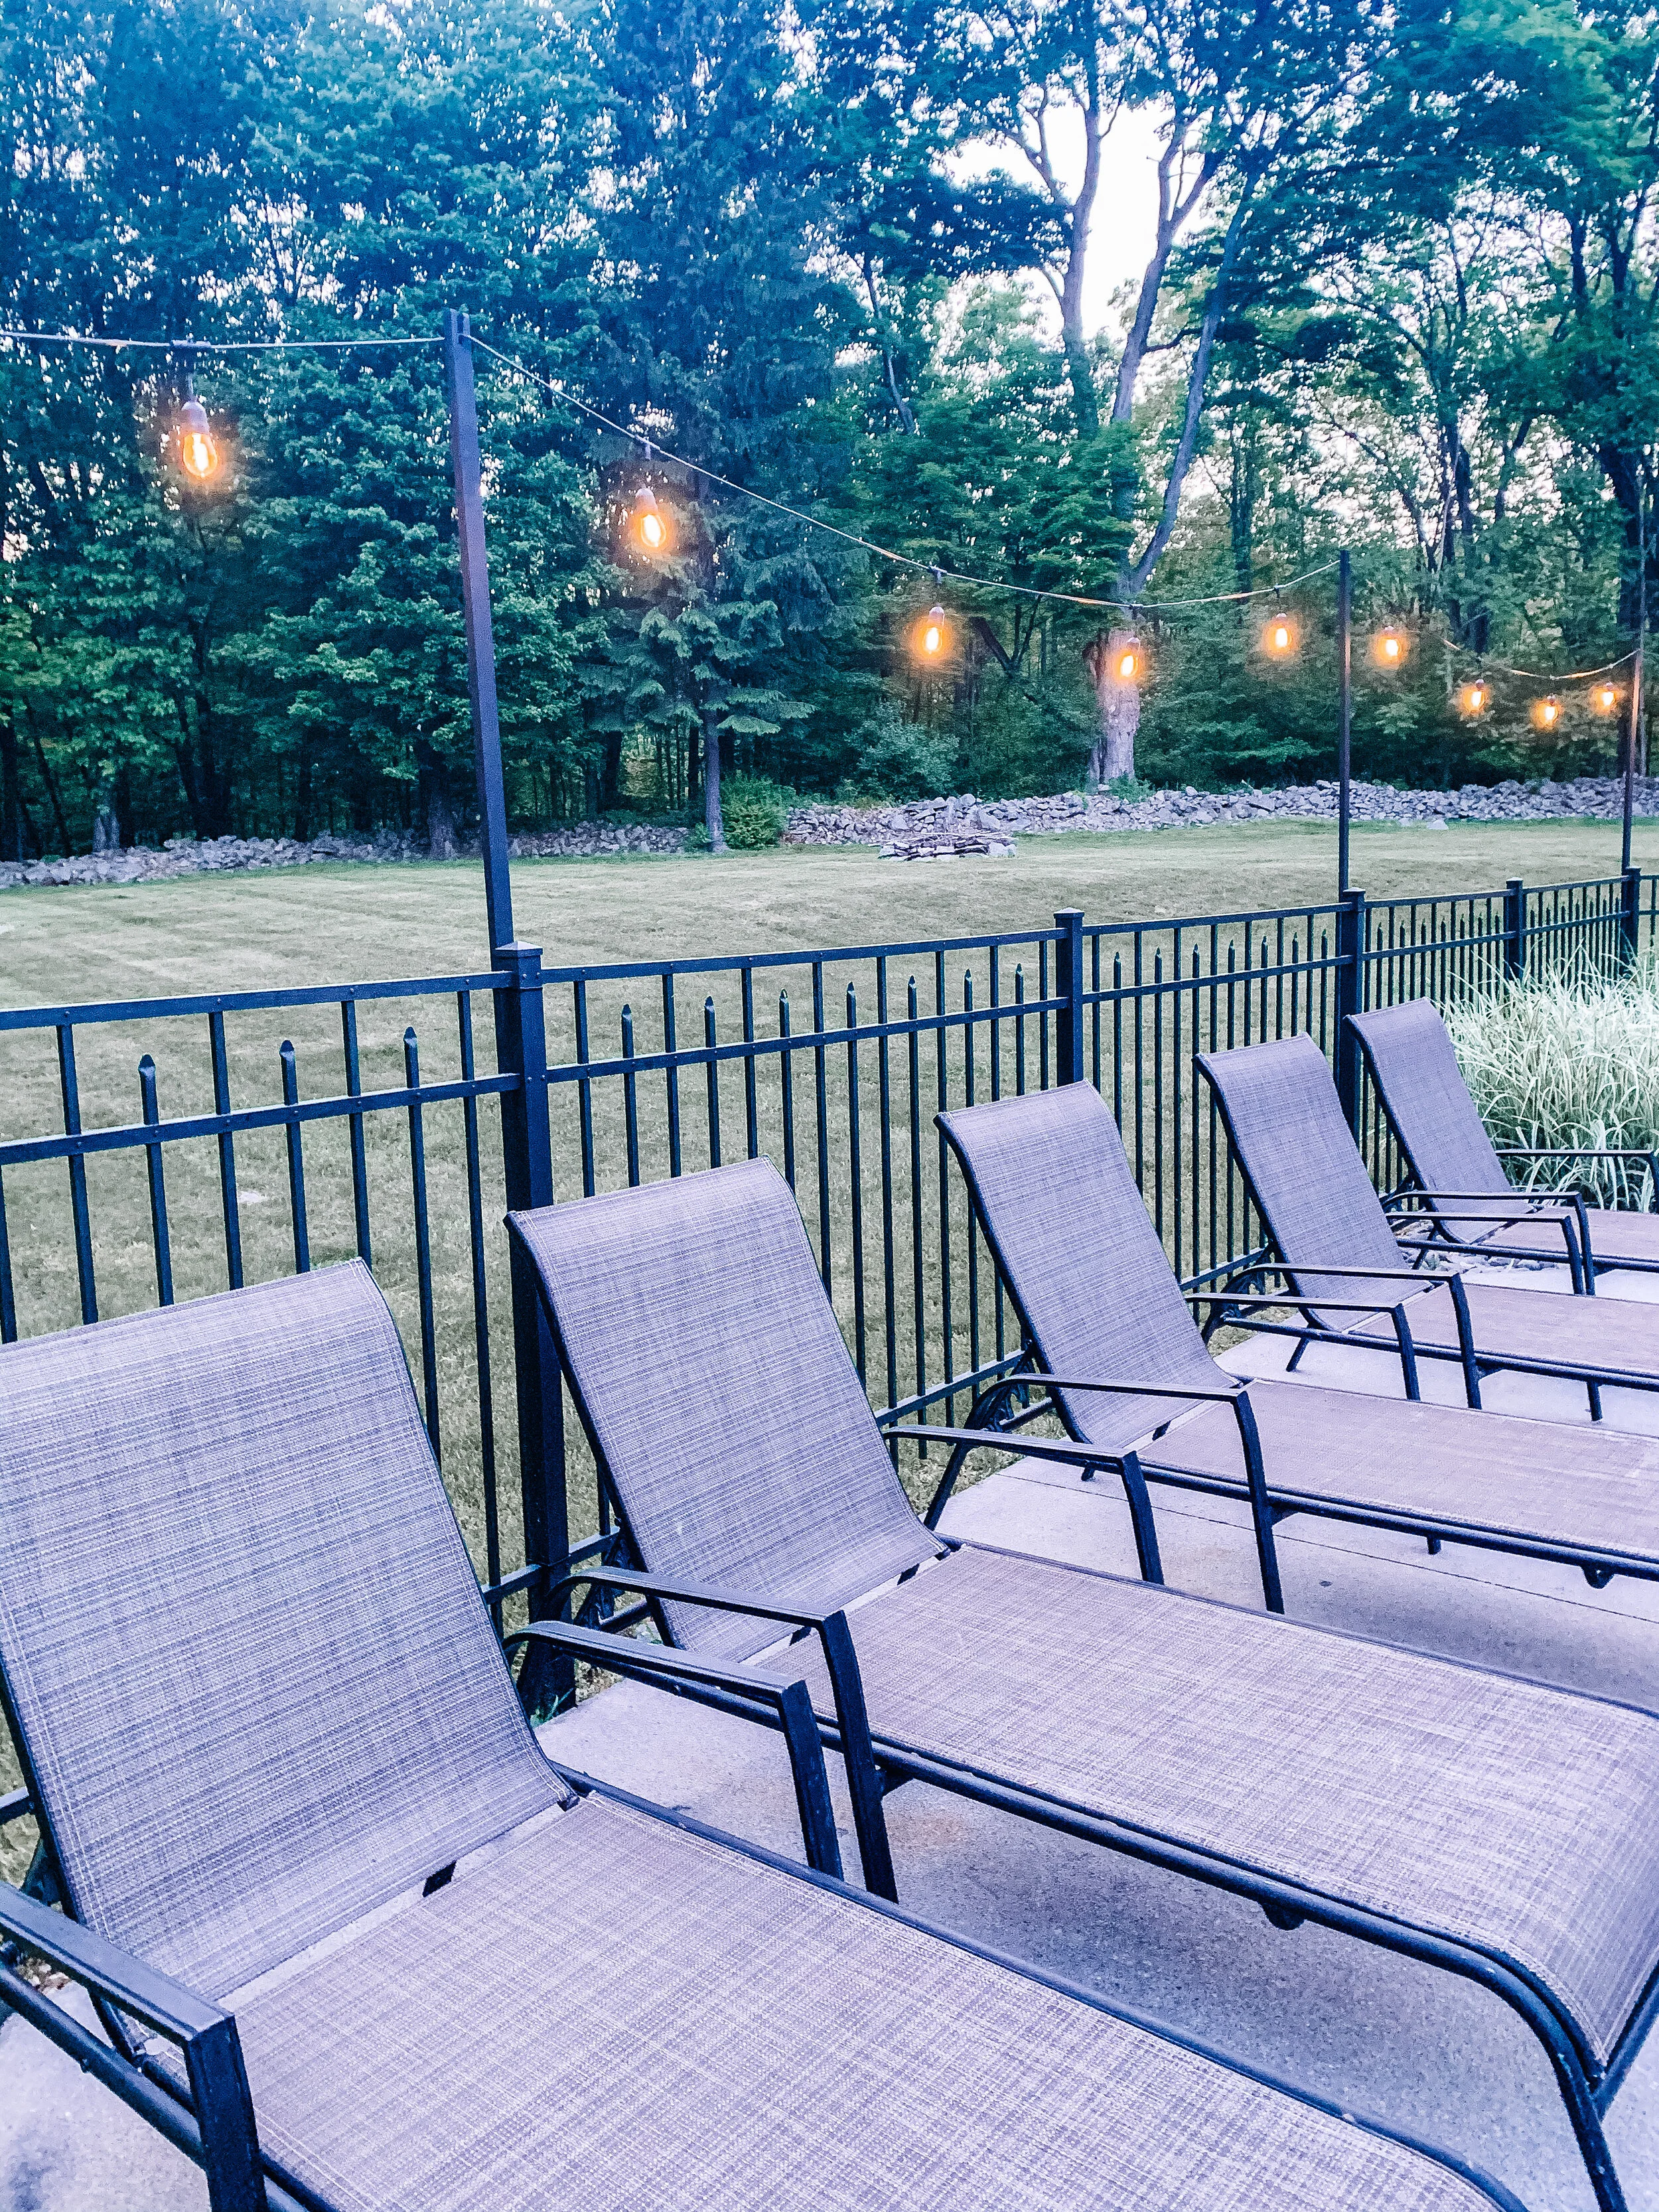
Check out how it came out:

This post will give a run down of the details how I did it, complete with materials and links to lights at the end. Feel free to modify it as you feel fit.
Materials for the posts:
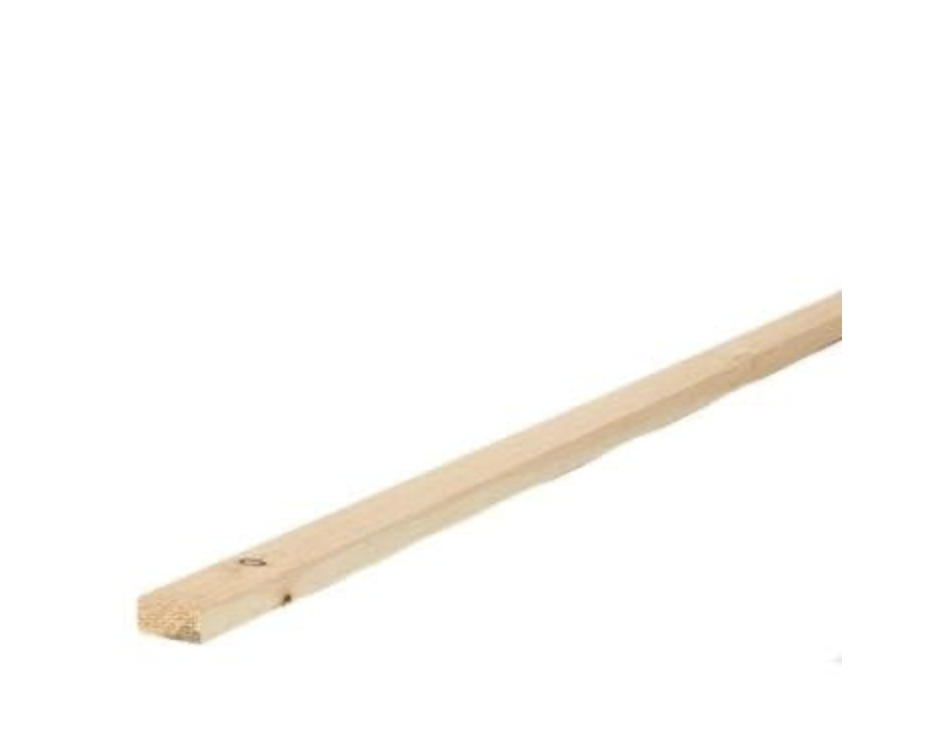


1 x 2 x 8 ft common board wood from your local lumber store (or longer depending upon your needs) for however many posts you need to purchase. For my deck I needed 4. For this project I needed ten. ($3.99 a pop, ran me around $40)
A quart of outdoor paint in the color of your choice- for my deck I did White to match the posts, and for my pool fence I did black to match the fence. ($12)
A small roller (I found it easiest and fasted to paint the posts with a roller instead of a paint brush)
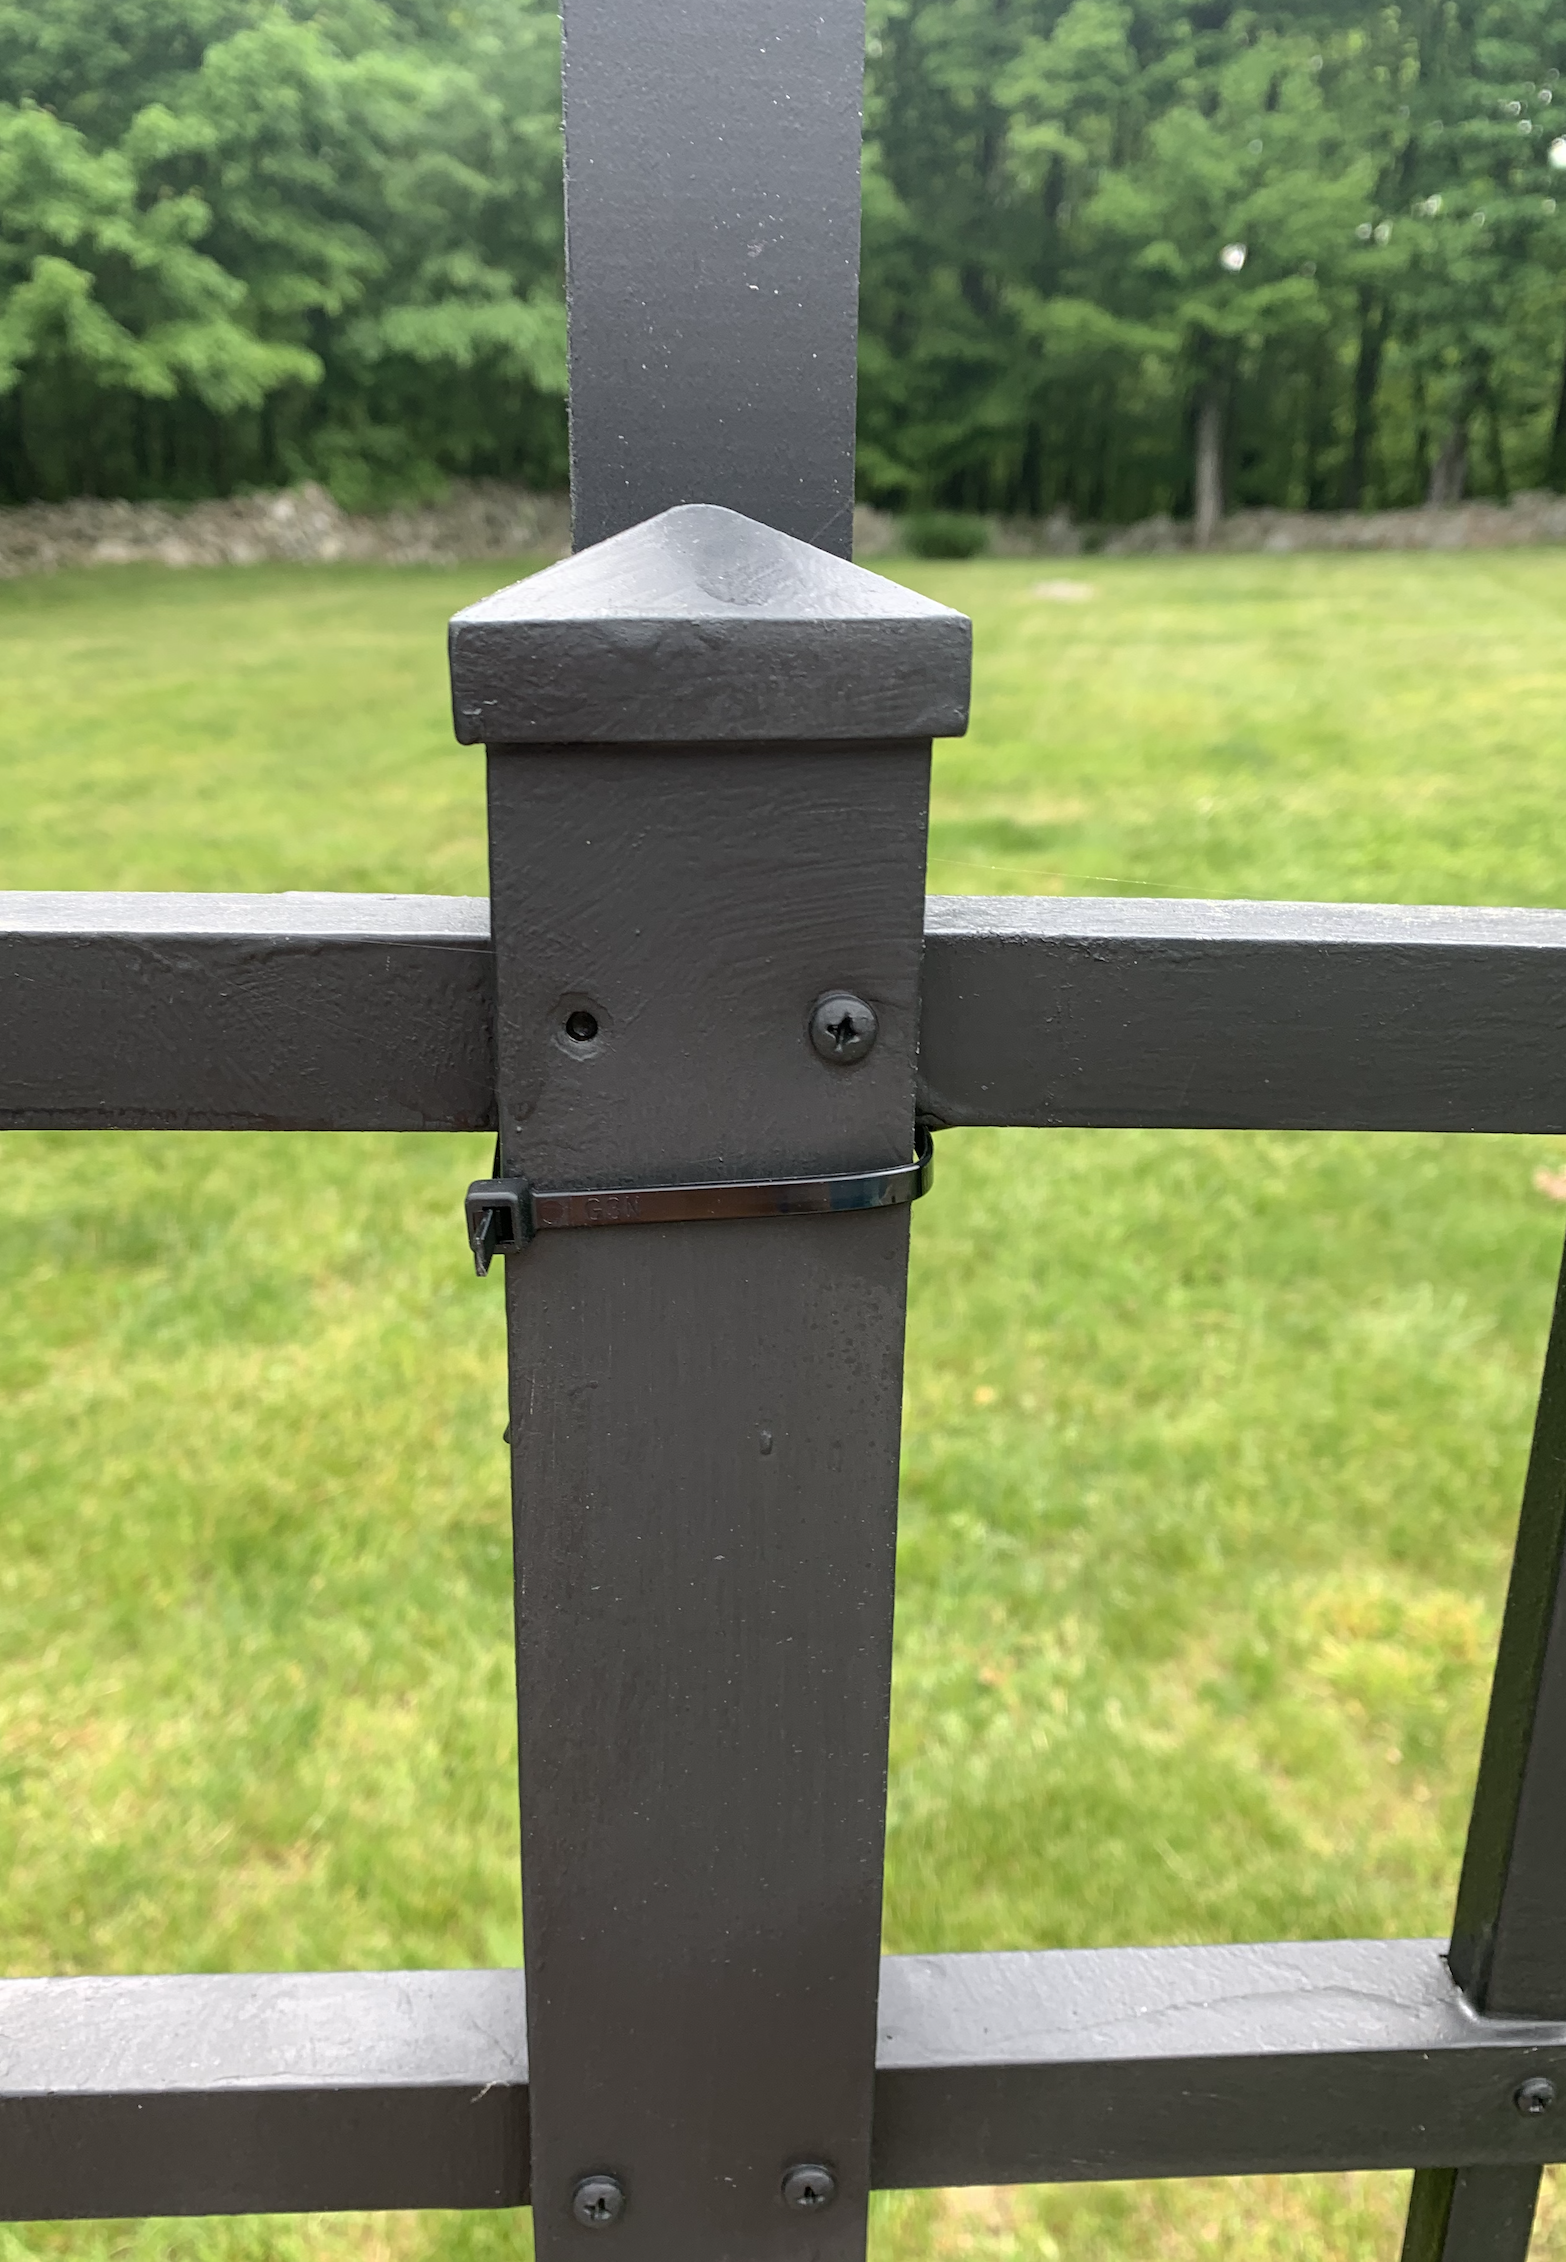
Black (or white or clear) zipties from the electrical section. I used 8 inch to fit around my pool fence posts. ($3.28)
A table saw to cut spaces in the top of the poles in order to string the lights through.
How I made the posts:
Step 1: I painted all sides of the posts three times. Luckily because I was working in hot weather, each coat only took minutes to dry.

Step 2: Using my table saw I cut slivers in to the top of each post about an inch down and wide enough to be able to fit the string light wires.


Step 3: I used a small paint brush to paint the exposed wood from my cuts.
Step 4: Using the zipties, I attached the poles to the outside of the fence at the top and bottom of the fence.

Step 5: Using a ladder I strung the lights through each point. I measured out how long of a string of lights I would need for my pool area- and it came out to just under 90 ft, so I ordered a 96 ft string of lights off amazon. Check out the links below to the lights I used around my deck area, pool area, and other choices I considered:

FAQ + Other Details
Which lights did you purchase? For my deck, I used #1 and didn’t have any issue over the years with summer storms and the breaking of bulbs. For my pool area since it was a larger span I decided to use the shatterproof plastic bulbs #6 shown above.
Have you had any issues with wind storms? Knock on wood- all of the light poles have stayed up over the years with no issues of lights or poles coming down in summer storms.
Do you keep the posts up all season? No I put them up each year around June and take them down in September when we pack up summer.
How has the paint held up? Since I used exterior paint, I only had to paint the light posts on my deck that initial time and it’s held up for over 5 summers.
If I’m using multiple strands how do I keep them connected when they’re hung up together? For my pool area I found a string of lights in the exact size I needed so I wouldn’t have to connect strands together. (Be sure to consider how many strands one outlet can hold without blowing a fuse prior to stringing them all up. )However for my deck area I used 3 of the 17 foot strands, and I connected them together with three zip ties as shown below:

How did you hide the extension cord? For my deck area I tucked it up in the vinyl siding above my sliding glass door, for my pool area I ran it at the base border of my shed to the outlet.
And there you have it… my DIY Light poles:

As always, thanks for stopping by, sharing, and supporting me! Happy Summer!
:) Barbra
If you enjoyed this post you might also enjoy:
Hey Friends, I spend a lot of time putting together these posts, and I would love it if you’d show some love back and followed me on Instagram. **** 10/2020: Recently my instagram was erased and I lost all of my following, so I would SO appreciate it if you followed me by clicking on any of the pictures below from my current feed. Thank you so much!! <3