
How to Stain Butcher Block Countertops
We’re on the last leg of our camper renovation over here and the spring-like weather made it the perfect temperature to tackle the butcher block countertops we’ll be using to replace the kitchen countertops in our camper.
Whenever I’ve stained something people have always commented that they don’t know how I’m able to do it… but I swear to you staining has to be the easiest thing in the world.
This post will break down the steps I used to finish our butcher block countertops.
Materials:
Butcher Block Countertop (Mine was a 96” slab in birch I purchased for $229 linked below)
Sander (Many recommended a palm sander with a rectangular bottom, I used my round orbital sander and it worked just fine)
Sanding pads: 80 grit and 120 grit
Wood Conditioner + foam brush or rag
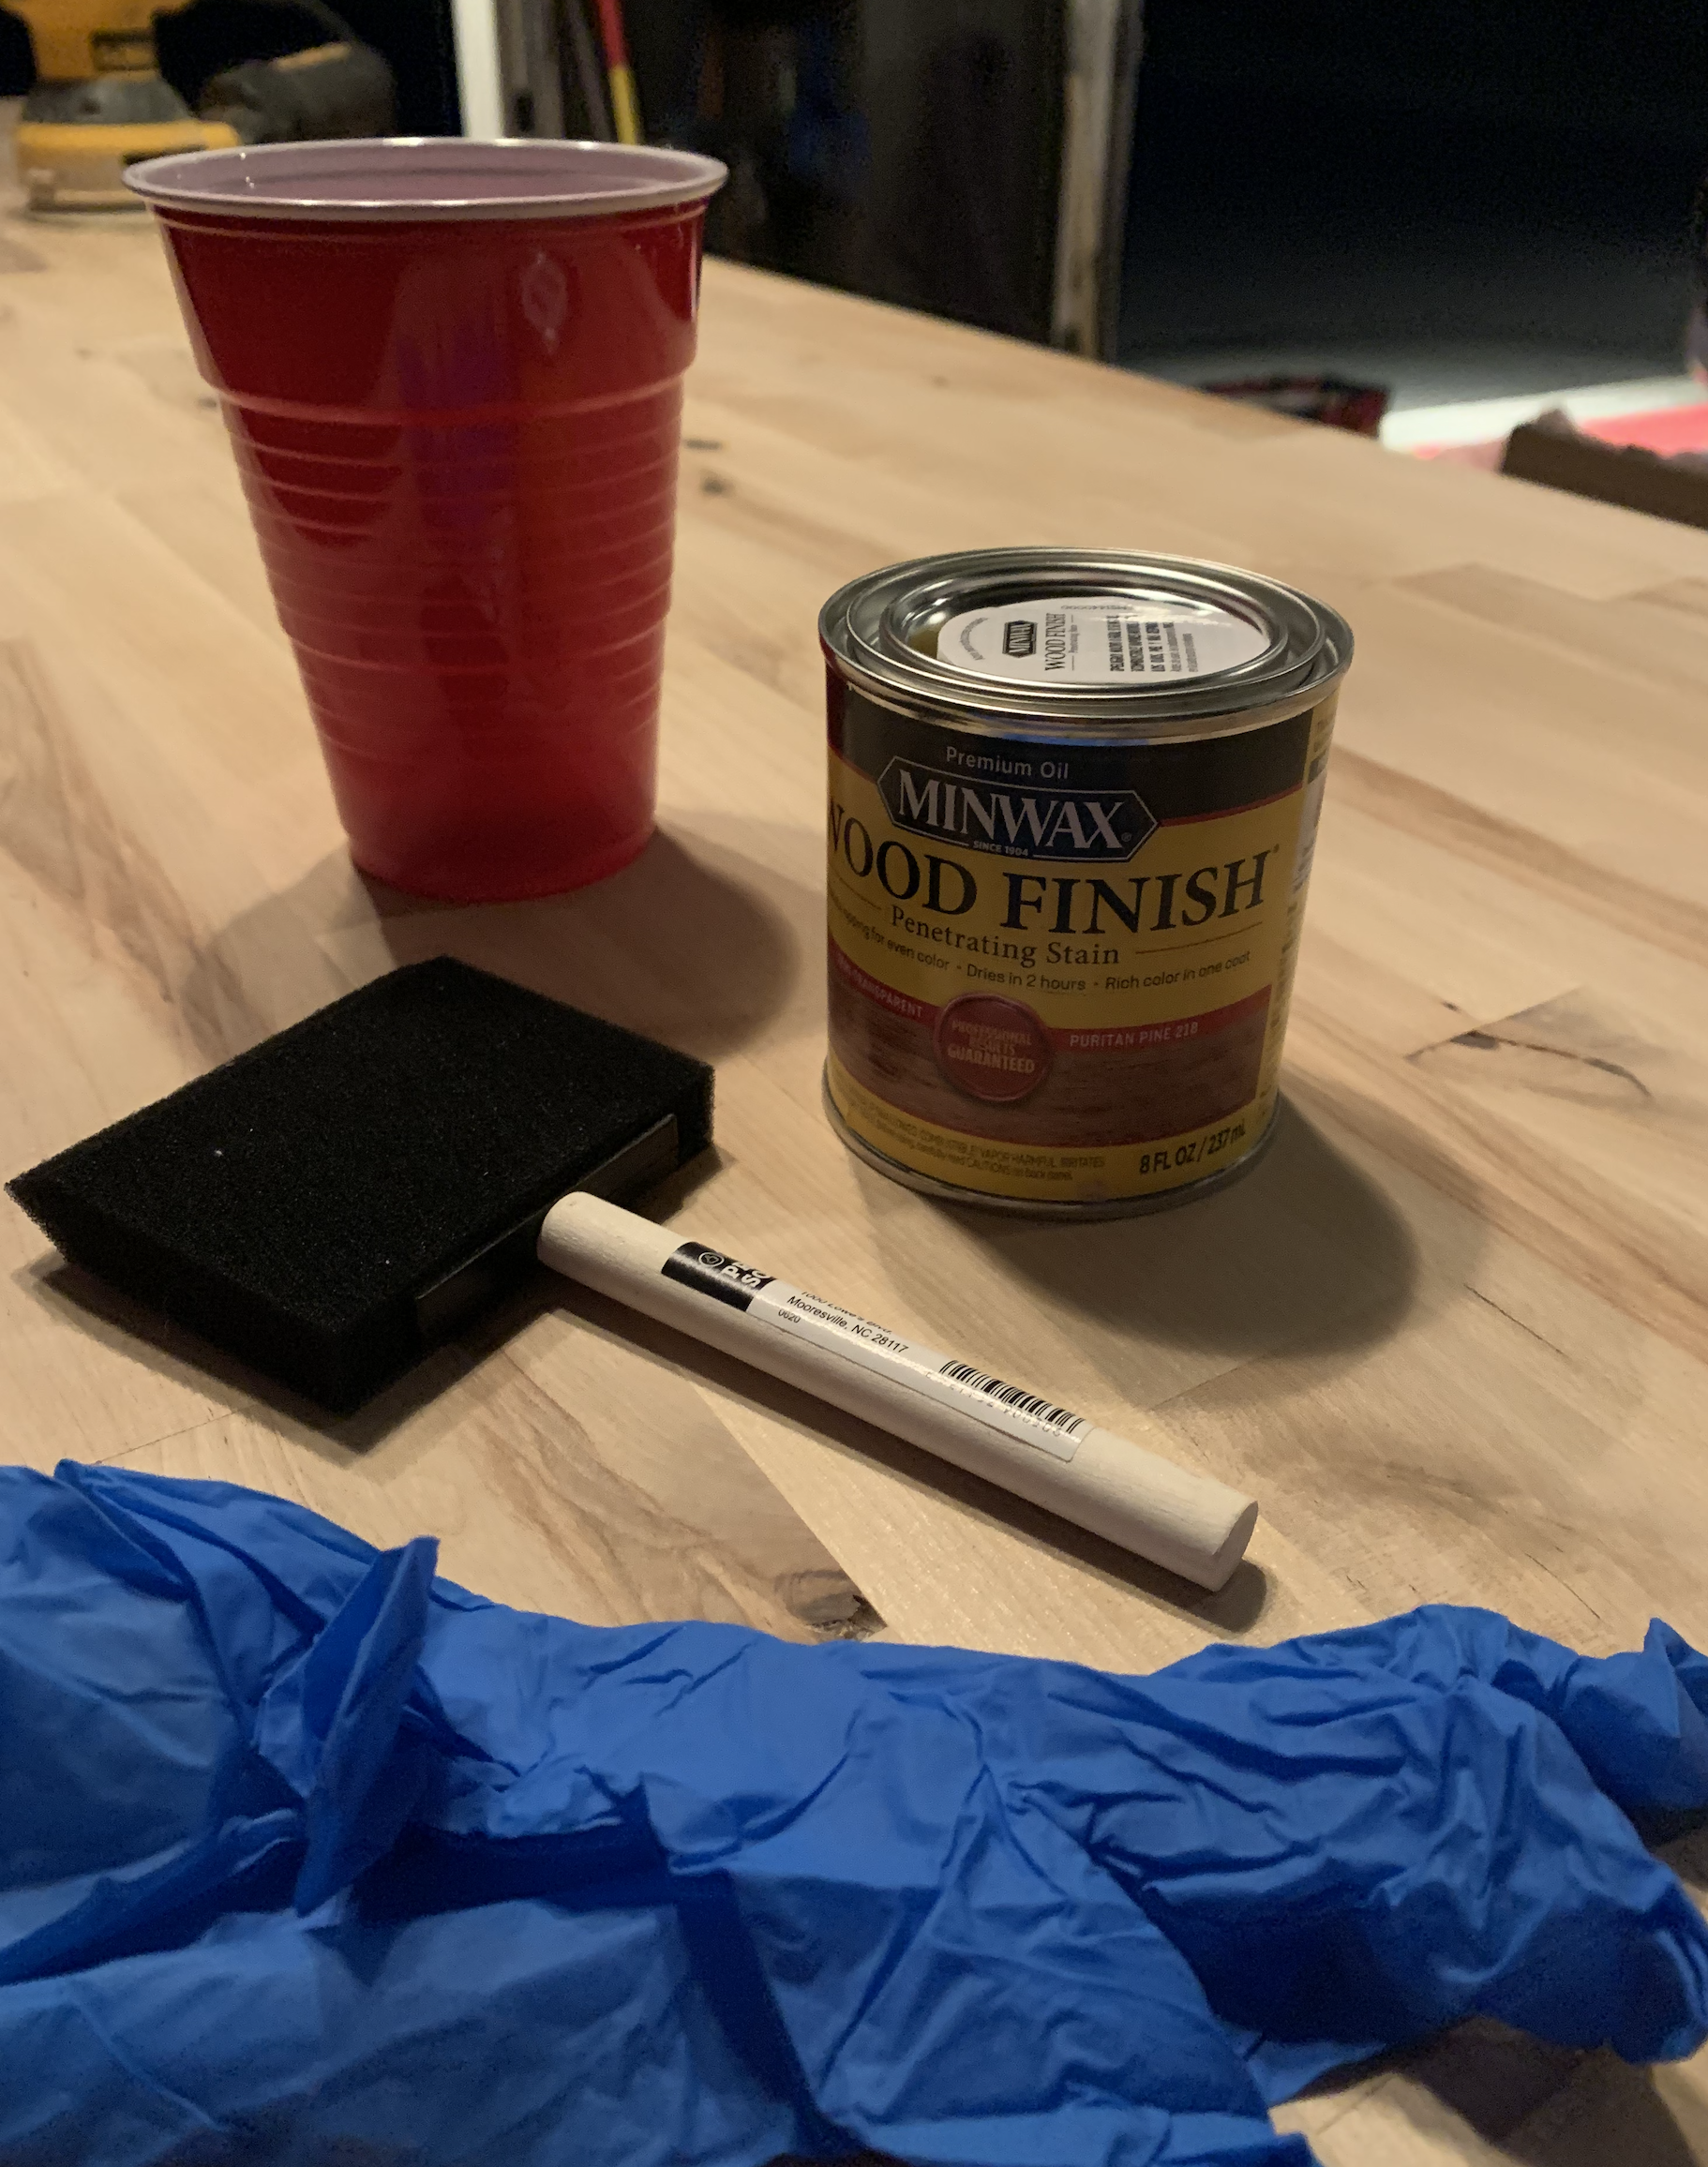
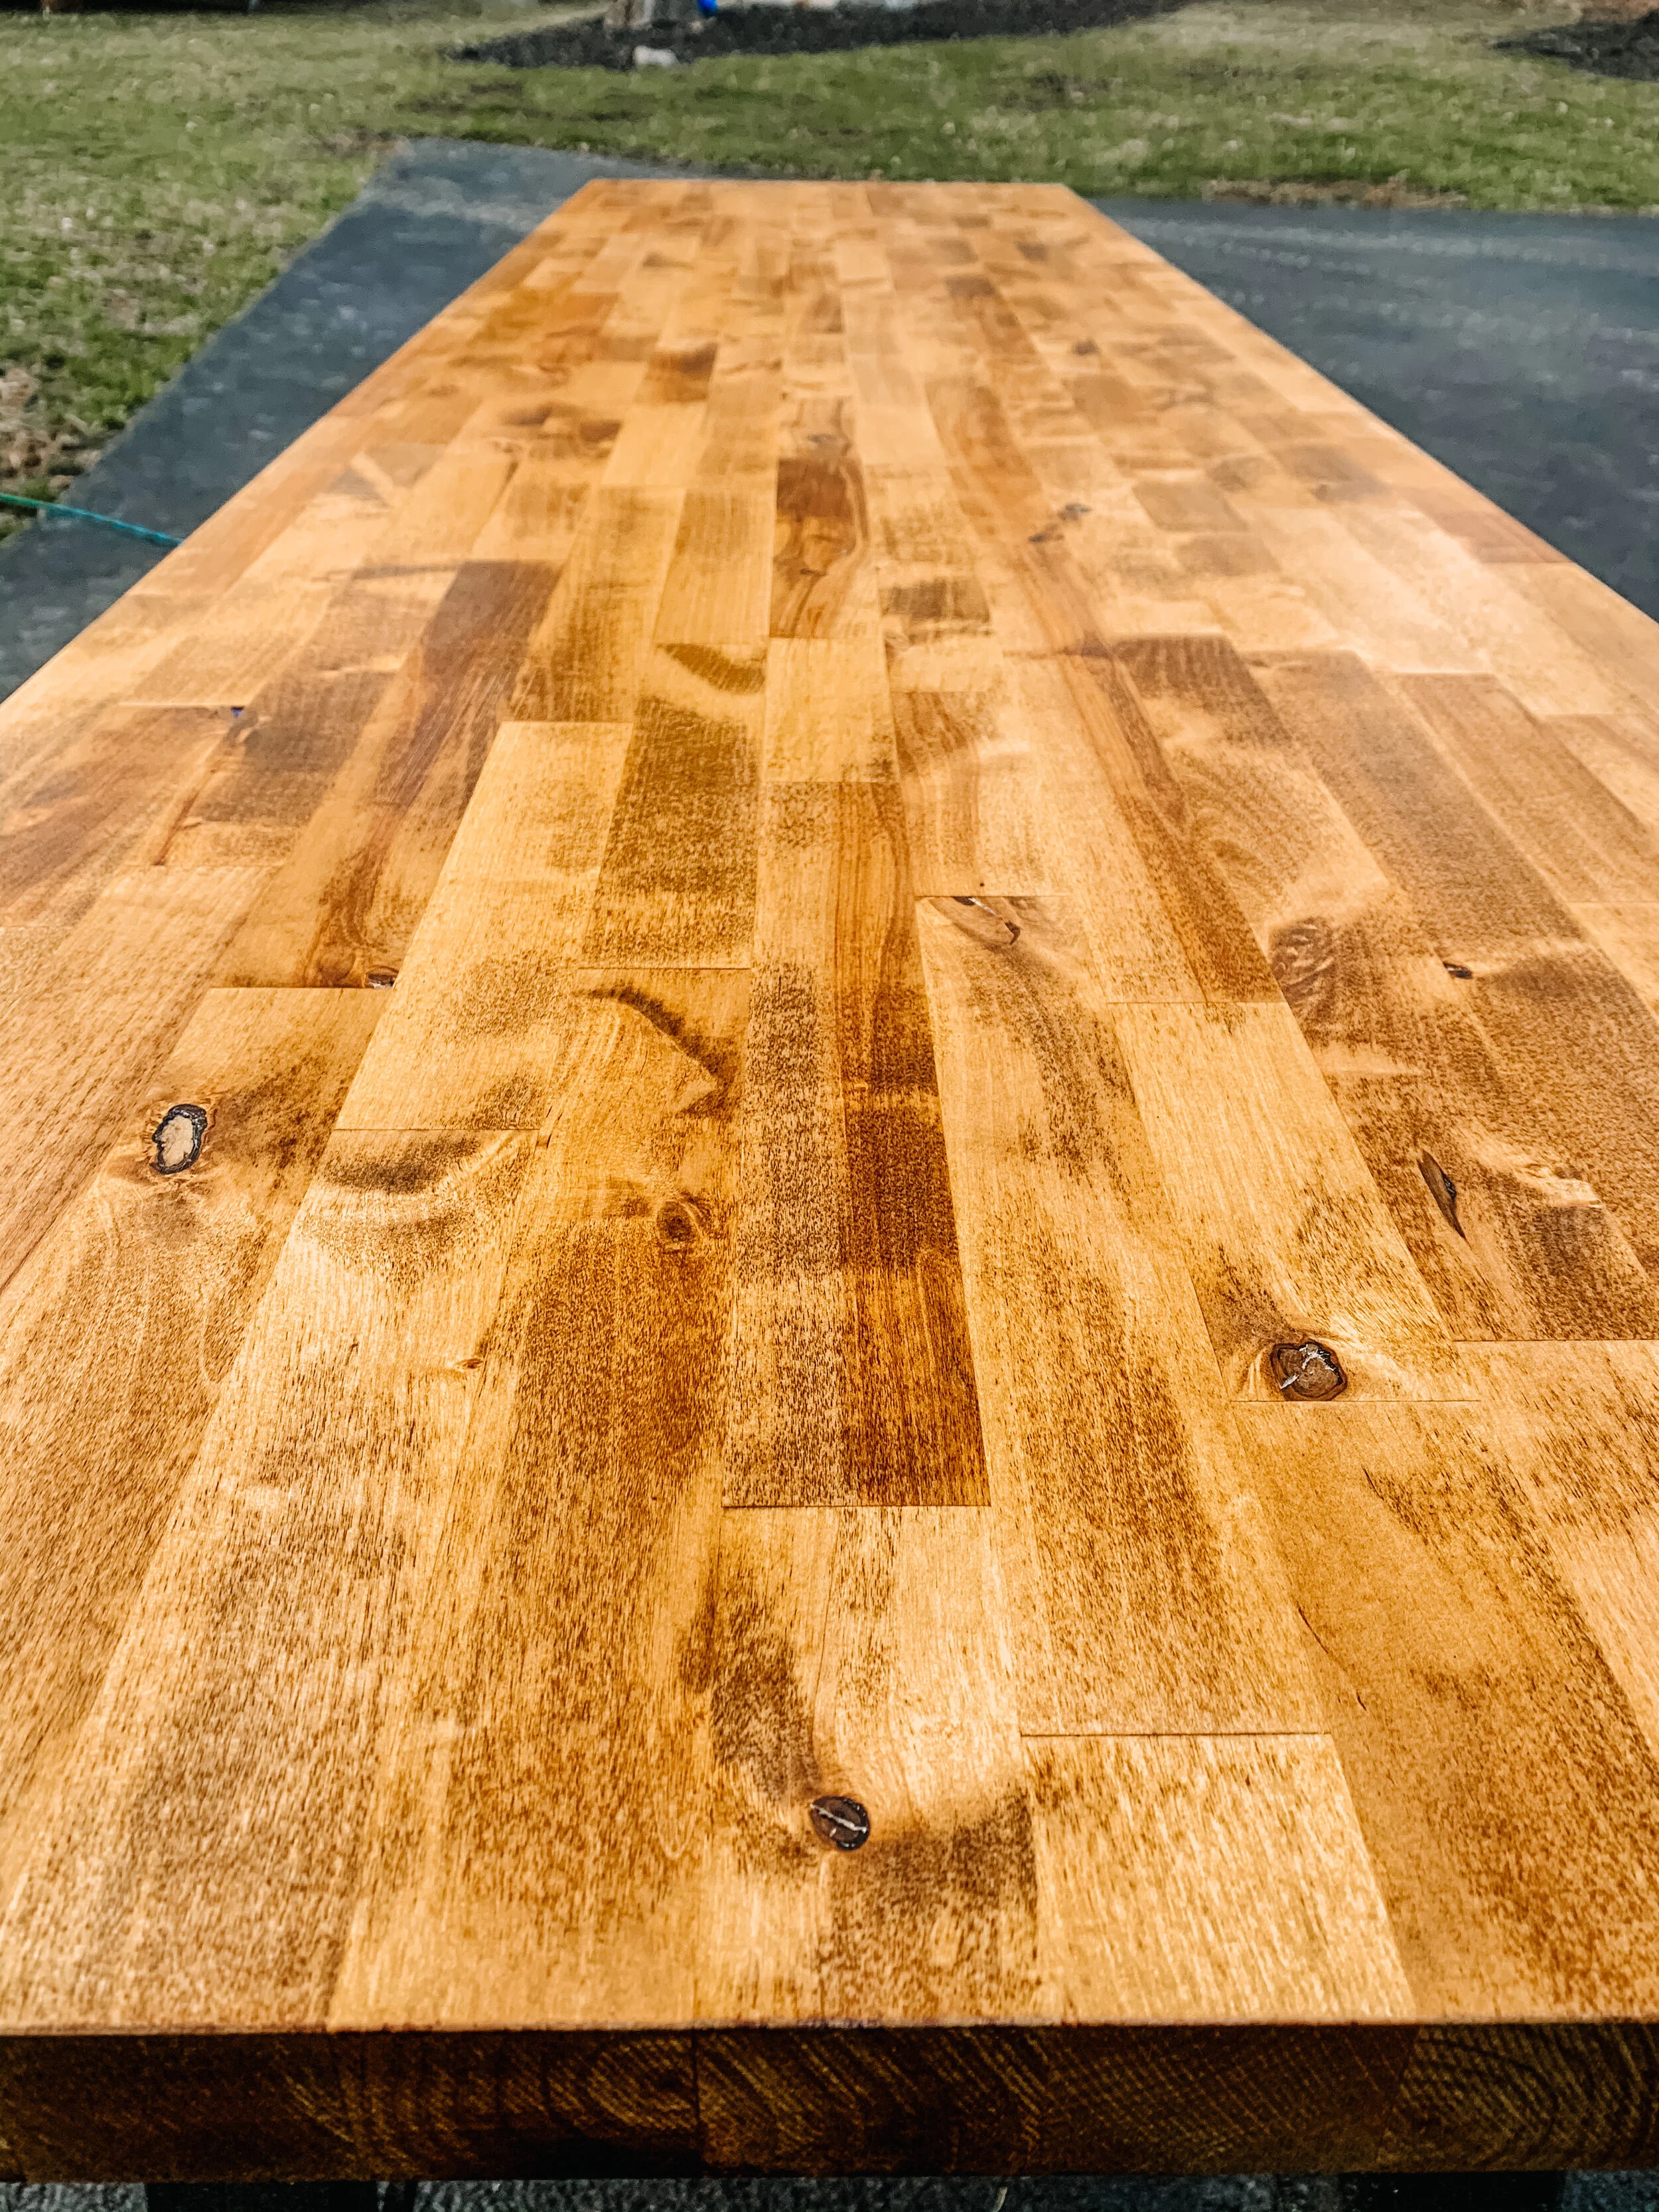
Stain of your choice: I used Minwax Puritan Pine + foam brush or rag
Rag for wiping excess stain
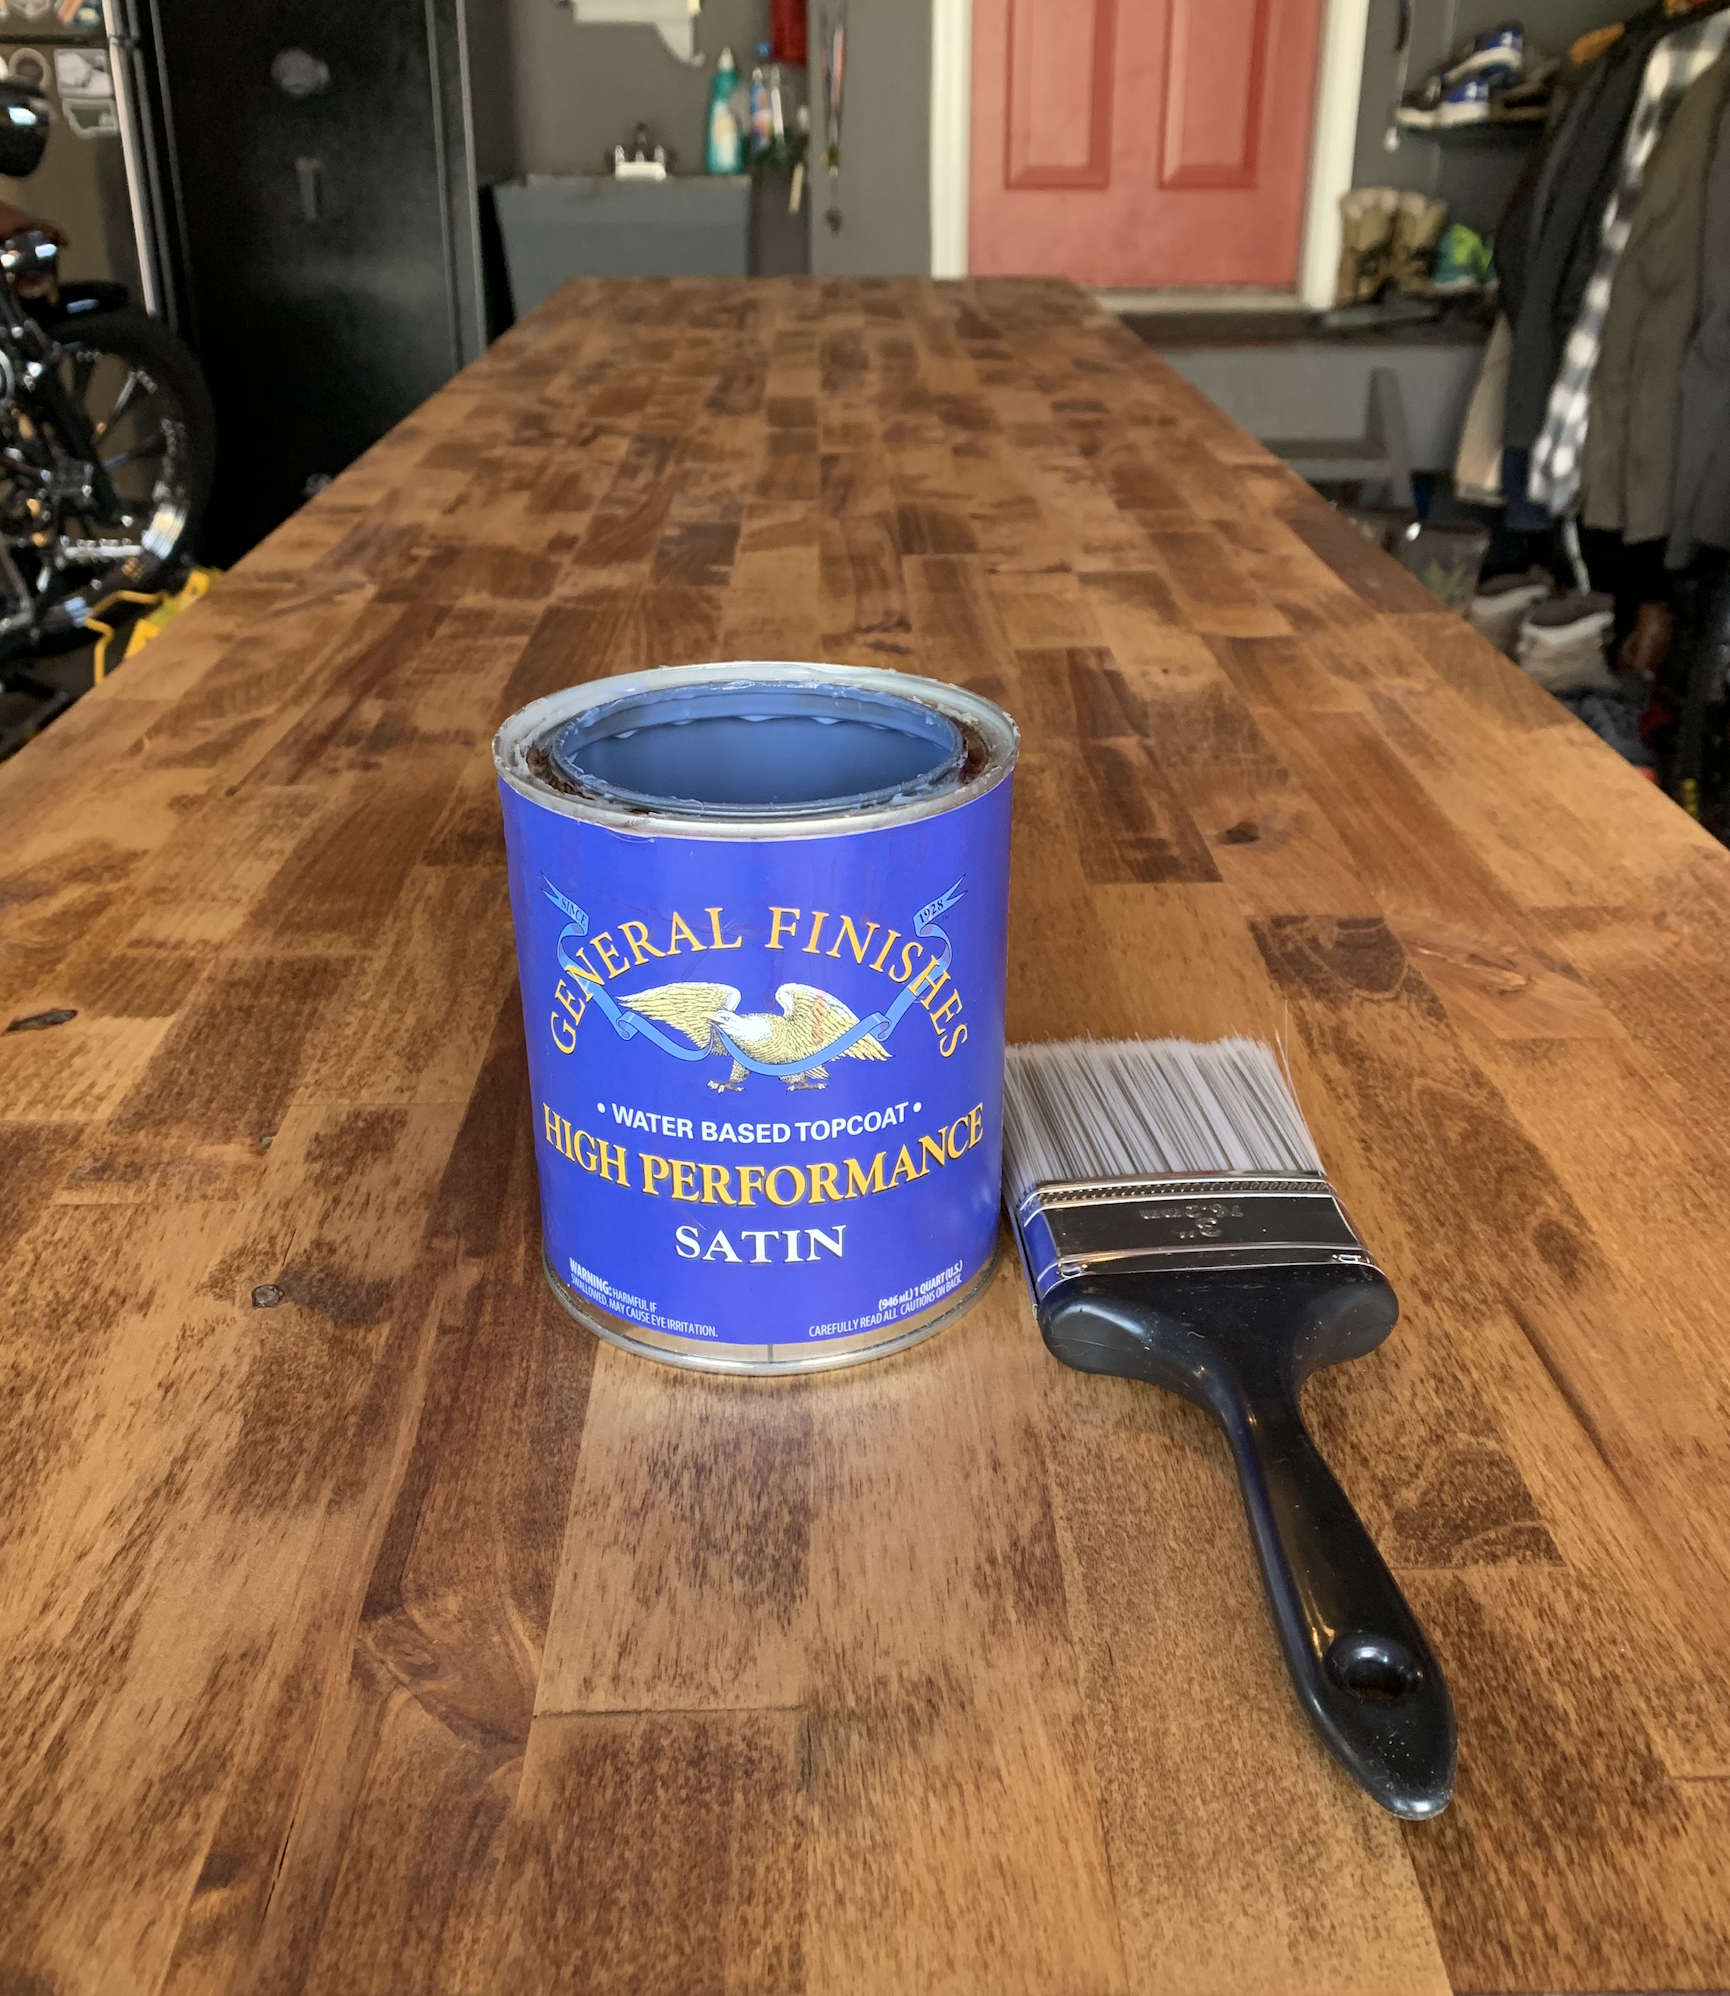
Paint brush + General Finishes Satin Polyutheane
120 grit sanding block (to sand between coats by hand)
Links to Items: just click below-
Steps:
Step 1: Sand your butcher block countertop with the 80 grit sandpaper and orbital sander first

Step 2: Wipe off dust with a rag and then sand with the 120 grit sandpaper and orbital sander

Step 3: Wipe off dust with a rag and then apply wood conditioner with a rag. Let dry overnight.
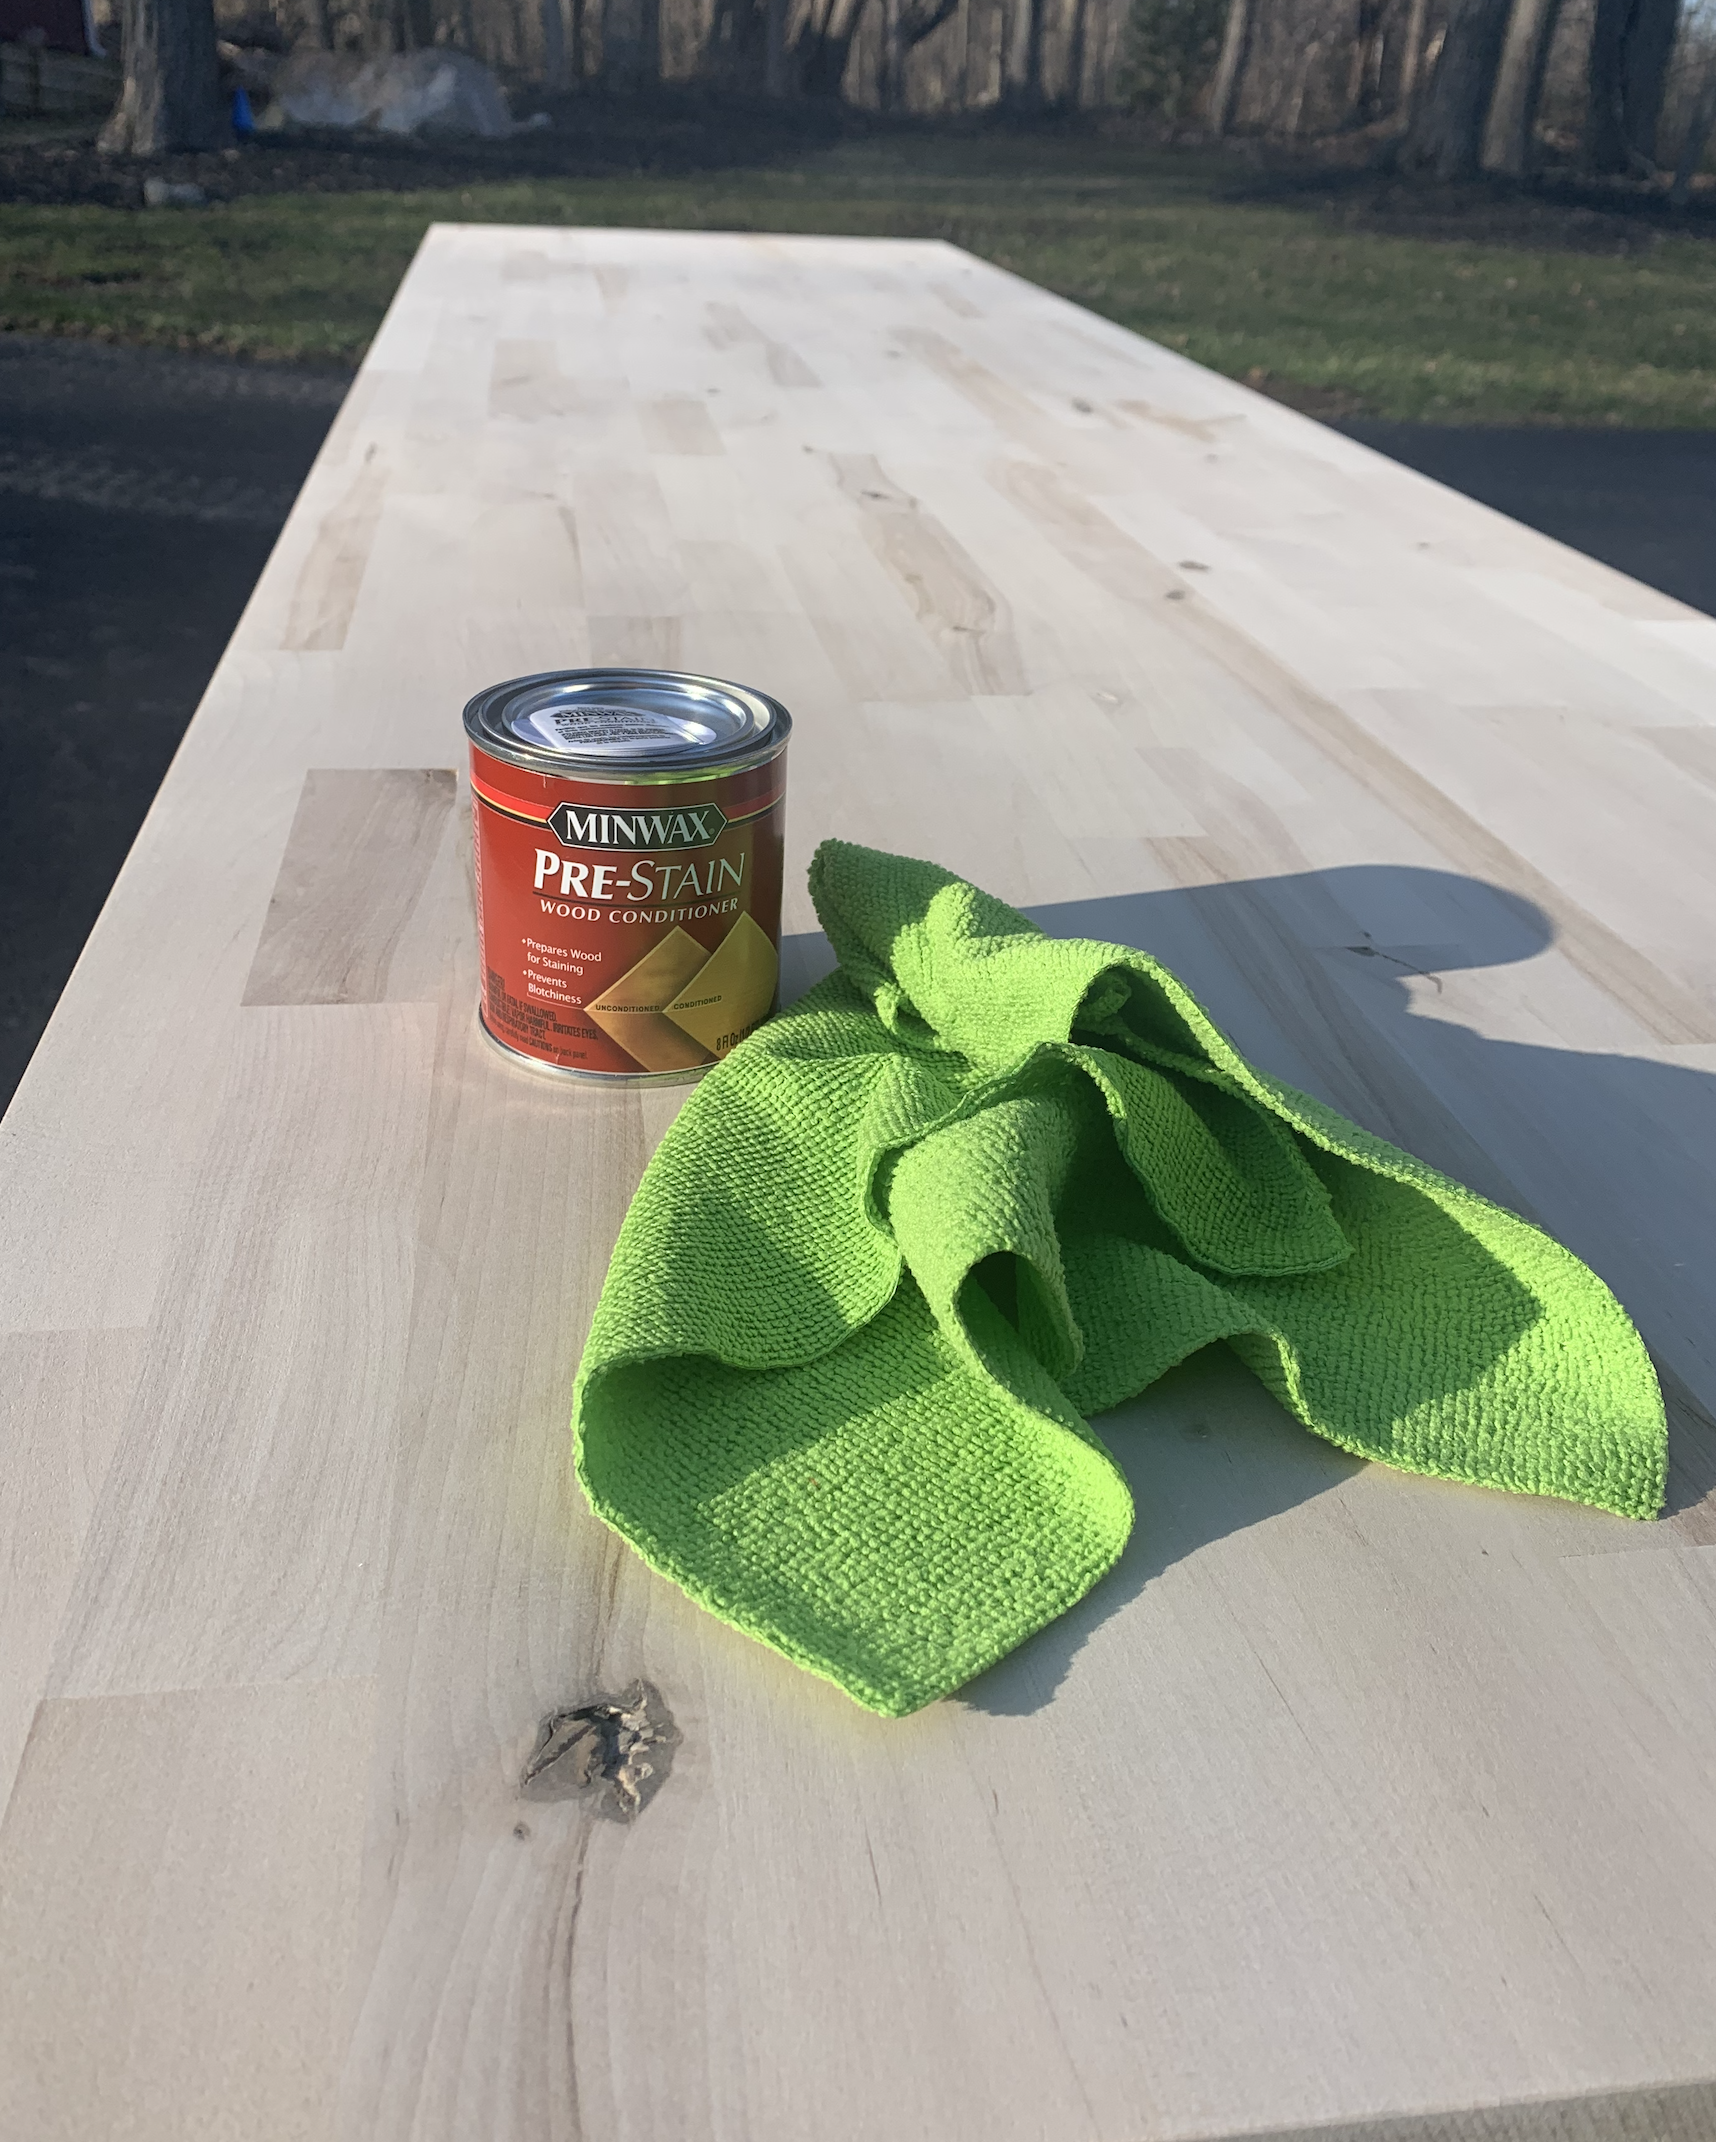
Step 4: Next day- sand down once more with the 120 grit sandpaper and orbital sander, then wipe off excess dust again. This is because the wood conditioner will make the wood raise a tad so it’s important to get the butcher block smooth again.

Step 5: Apply stain in straight lines using the foam brush. You can use a rag, but I find the foam brushes the easiest to stain with. I worked in rows of three then wiping the excess off. I also covered about an inch of the underside all the way around in case there’s an overhand. If you are using this for an island, you’ll definitley have to cover more than an inch of the under side. I let the stain sit for a few minutes then wiped the excess off with a rag. Let dry overnight.

Step 6: Poly! Apply your first coat of poly in straight lights across like you did the stain. Note: I read that you should also poly the sides and underside of the butcher block with at least one coat to prevent it from drying out or cracking down the road. Hands down, this is my favorite polyurethane product. It goes on easy, dries fast, and has the smoothest finish of any product I’ve used.
Step 7: Allow it to dry a few hours then lightly sand with the 120 grit sanding block by hand. Wipe off excess dust from sanding. I would not recommend using the oribital sander again for this. Definitely sand by hand. Your goal is to just sand the grittiness off. Make sure it’s warm enough for your poly to dry. If it’s too cold you could get this milky film finish on it and you’ll have to sand it to start all over.

Step 8: Repeat Step 7 again for second coat. Allow 30 minutes to dry between the second and third coat.
Step 9: Apply your third coat of poly and let dry. No need to sand. And you’re done!
FAQ:
Are butcher block countertops safe to use in a kitchen?
The jury is out on this one. It’s all about personal preference. I personally would never have butcher block countertops as my regular counters within my kitchen because it takes a lot of effort to keep up with them. However for a laundry room, RV, office desk top, etc, I definitely would. You have to be careful with butcher block countertops around sink areas. Therefore in our camper we are doing a drop- in sink.
Is poly safe to prepare food on?
Everything I read on the internet convinced me it was.
Don’t want to stain and poly your countertops?
Try mineral oil or Howard Product’s Beeswax Butcher Block Oil. This will not protect the top like poly will, it will just simply condition it.
How soon after I bring home the top should I finish it?
I actually didn’t know there was a recommended time limit on finishing the top until I took the shrink wrap off mine. It said “finish within 48 hours to prevent warping”. Then I said… oh shit, and ran to my local home improvement store. Originally I had planned on finishing this over my spring break. So within a 48 hour time period I sanded, stained, and poly’ed the top.
Do I have to poly all sides?
Everything I read recommended it as a way of preventing the drying out and cracking of the top from underneath.
What stain is used above?
Color: Puritan Pine by Minwax.
And there you have it: an easy DIY to finish your butcher block countertop. I promise… if I can do it, so can you! As always, thanks for stopping by, reading, and supporting me! Have any ideas of what you’d like to see on my blog? Feel free to comment below or share with a friend!
<3 Barbra
If you enjoyed this post, you might also enjoy my other posts:
Hey Friends, I spend a lot of time putting together these posts, and I would love it if you’d show some love back and followed me on Instagram. **** 10/2020: Recently my instagram was erased and I lost all of my following, so I would SO appreciate it if you followed me by clicking on any of the pictures below from my current feed. Thank you so much!! <3