
DIY Craft Room Command Center
Organization is my thing… I don’t know why, but I get really excited when it comes to organizing the “lots of little things”. If you were to come into my classroom, you’d see that I utilize every wall in some way to organize the tons of papers and “little things” that come along with teaching. So when my client Debbie asked me to help her design and organize her new sewing room- I literally could not wait.
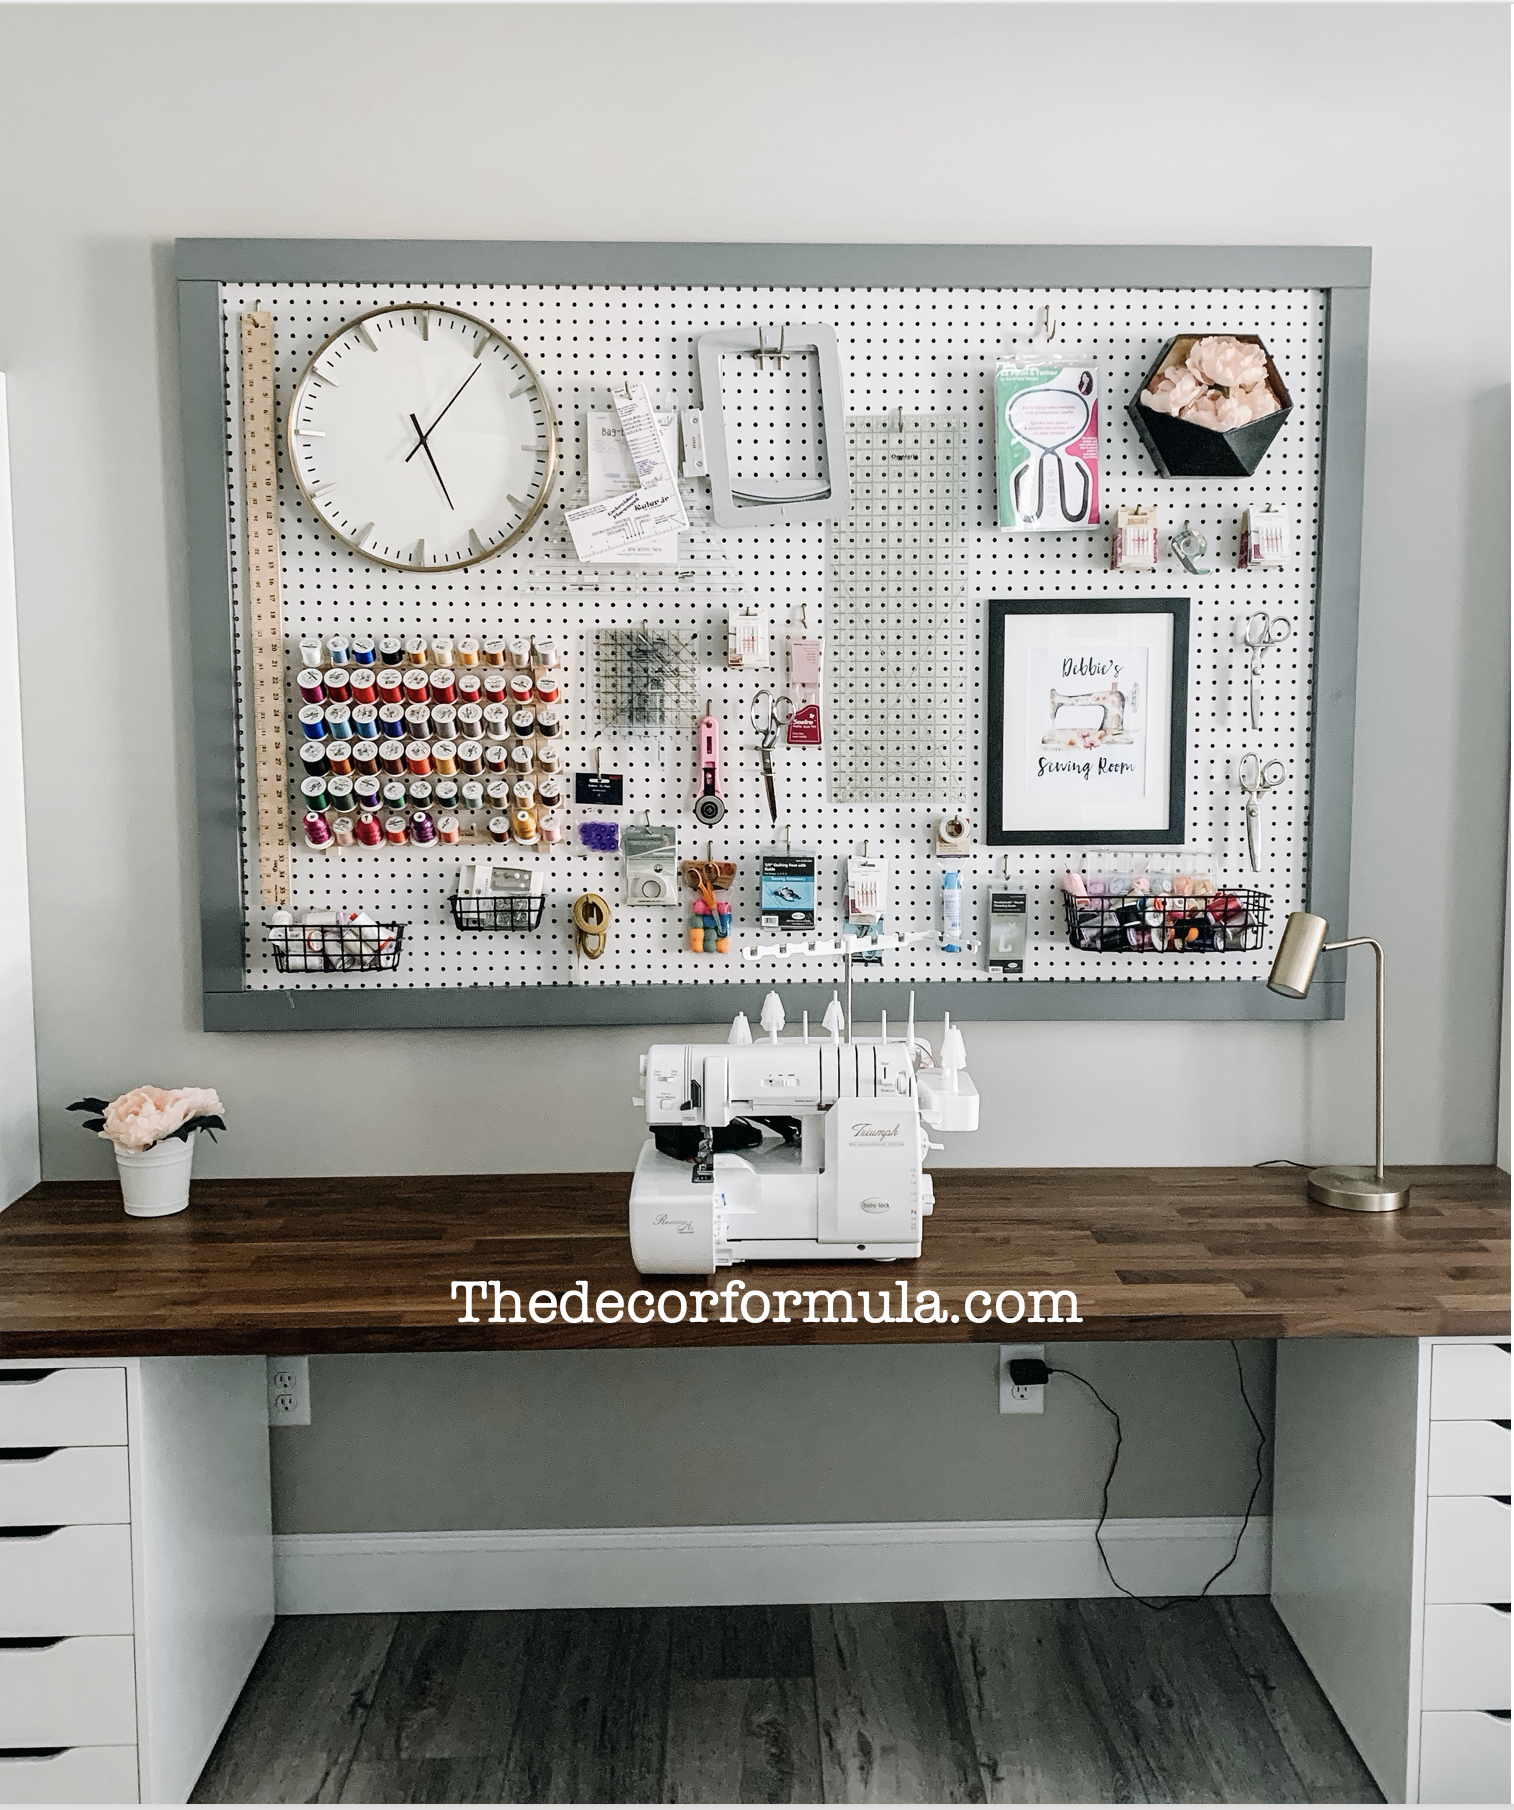
Debbie is passionate about sewing and quilting and while I’m not well versed in the craft, I soon learned there are tons of little tools that come along with the sewing craft. From scissors to needles, hoops, rotary cutters, and tons of spools, this pegboard command center was the perfect way to organize and display her tools for easy access.
And I just love how it came out:


The best part is that it was a pretty inexpensive (for the size) and easy build.
So here are the details:
Materials for the board itself:
4’x8’ pegboard * Cut down to size at Home Depot. My board was cut down to 6’ for this project.
1x4 pre-primed boards cut to the length and width of your pegboard to serve as your exterior border.
1x5 common board cut to the length and width of your pegboard to serve as the back border (you need to create a gap between the pegboard and the wall so that the hooks have space to latch in).
Liquid Nails for gluing
1 1/2 screws
Pocket-hole screws
Paint for your border
(Linked by clicking on the picture)


Tools:
Tape measure + pencil
Miter Saw for cuts
Clamps for after glueing
Kreg-jig pocket hole maker * (Optional: I decided to secure my back border 1x4’s to one another in addition to gluing and screwing).
Steps:
Step 1: Have Home Depot cut your pegboard in the store down to the size you want. I determined that a 4’ by 6’ board would be perfect. So a worker at HD cut 2 feet off the board for me at the store.

Step 2: Create Back Border: Since your pegboard needs space for the hooks to be able to latch through the board, first I made the back border (which you don’t see in the picture) from 1x4 common boards cut to the length and width of my pegboard. I joined them together using my pocket hole Kreg Jig. Then I used liquid nails to glue the border to the back of the pegboard, followed by clamping it over night until it was dry.

Step 3: Front Border: I cut my pre-primed white border boards and pre-painted them. I then added liquid nails to the back of the border and clamped it on the front of the board. I waited for it to dry before turning the entire pegboard over and screwing it from the back with 1.5” screws, so there are no actual screw holes on the front side.

Step 4: Hanging Hardware- I found the easiest way to hang this was to buy the Hangman French cleat system from Home Depot. They sell them in various lengths to hold various weights. I bought the 400lbs, 2 foot french cleat. (I couldn’t find it on the website, but linked the 300 lbs one instead). My board isn’t anywhere near 100 lbs, but since this cleat was 2 feet in length, I felt it was better for my 6’ ft long board). Directions are included with the Hangman cleat. (Linked by clicking on the picture)

Accessories:

For the Pegboard hooks I purchased a set that came with three baskets from Amazon. I wanted the silver hooks to go with the black and gold theme so I spray painted them gold. Obviously this is optional.

All linked here:


And there you have it: a beautiful craft room command center. As always, thanks for stopping by, reading, and supporting me! Have any ideas of what you’d like to see on my blog? Feel free to comment below or share with a friend!
<3 Barbra
If you enjoyed this post, you might also enjoy my other posts:
Hey Friends, I spend a lot of time putting together these posts, and I would love it if you’d show some love back and followed me on Instagram. **** 10/2020: Recently my instagram was erased and I lost all of my following, so I would SO appreciate it if you followed me by clicking on any of the pictures below from my current feed. Thank you so much!! <3